Time to set up our landing page if a user does not have the necessary permission.
Go to Cognito service, and click on “manage user pools”. On the top right click on “Create a user pool”.
For Pool name, write any name you want.
Click Review Default. Leave everything as is, we are just going to change App Clients.
- Give the app client a name such as “WildRydesWebApp”.
- Under Auth Flow, check all boxes.
- Choose Create app client.
- Note the App client id for the newly created application.
- Click on “Return to pool details” and then “create pool”
From the Pool Details page for your user pool, select App clients from the left General Settings section in the navigation bar.
- Tick “Select all” checkbox.
- CallBack URL will be our Cloudfront URL.
- Under “Allowed OAuth Flows”, tick “implicit grant”
- Allowed OAuth Scopes, you can tick all
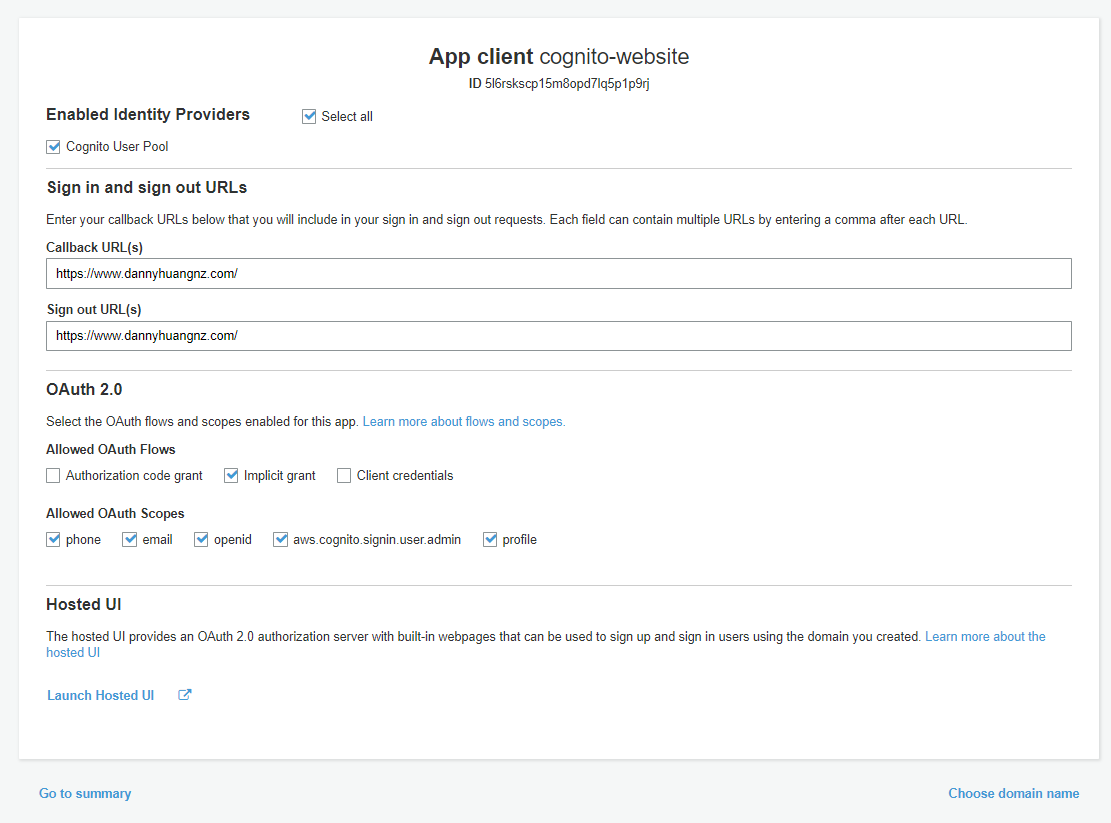
Now you see how there is a “Hosted UI”, This may or may not be enabled for you, so we will revisit this in the next section.
Click “choose domain name”.
In this section, we will set up our Cognito domain name that we are routing to if users are unauthenticated/get tokens. Make any name you desire but it needs to be unique, you can’t use the word “Cognito”. And save changes.
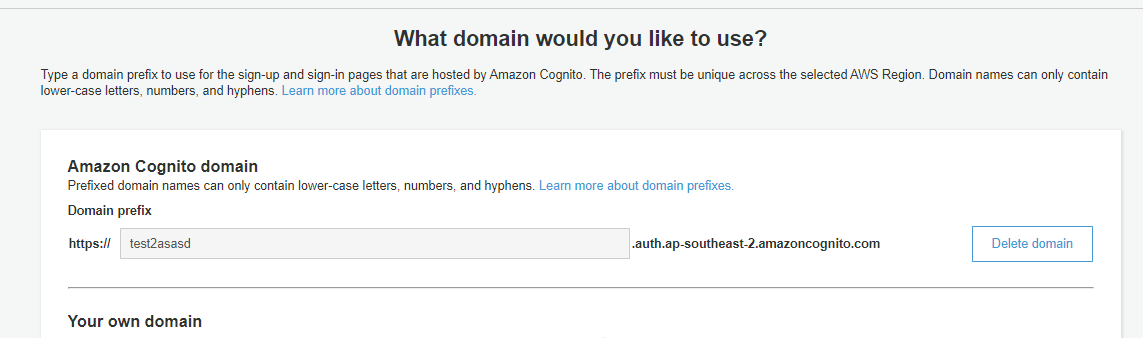
This will take 10mins to deploy, but for some it will be immediate.
Going back a page, Launch the UI and copy the URL, this is important as will be our redirect for our app.
Jumping back to our React App. In “App.js” paste the following just below the App function.
  function getToken() {
    try{
    var idtoken = window.location.href;
    var idtoken1 = idtoken.split("=")[1];
    var idtoken2 = idtoken1.split("&")[0];
    var idtoken3 = idtoken2.split("&")[0];

    return idtoken1, idtoken2, idtoken3;
    }
    catch{
      window.location.replace(<Replace with your cognito url>);
    }
  }

  let idtoken1,
    idtoken2,
    idtoken3 = getToken();
Ignoring id tokens for now, we can see that if the try block fails, we are redirected to our Cognito website. Sounds familiar?
We can infer id Token has to do with something with the authentication token and that’s correct.
Now let’s build and deploy these changes, run the following again to deploy to s3.
yarn build
yarn deploy
Hopefully,the Cognito URL is deployed. Let’s go to the Cognito URL we had earlier and hopefully, you should see this page.
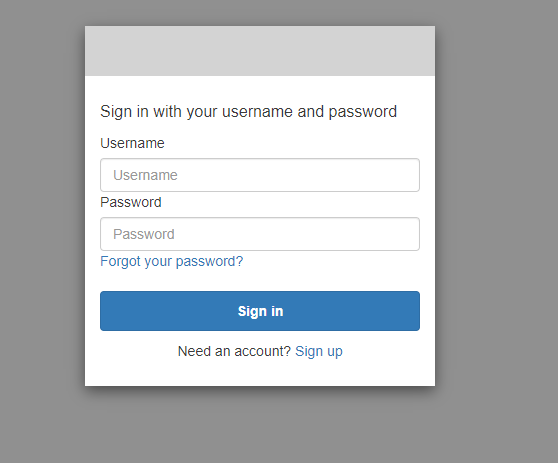
Sign up for now, and you should receive a verification email. Verify yourself, and you should now be redirected to your app.
Cool, let’s access this using the S3 static URL. You should be automatically redirected to the sign-on page.
Cool, let’s access this via Cloudfront URL. Wait why isn’t it working? It works via the S3 static URL, but not Cloudfront?…
https://stackoverflow.com/questions/30154461/aws-cloudfront-not-updating-on-update-of-files-in-s3
To fix this, all we have to do is go to Cloudfront service, to our distribution, under ‘invalidations’ tab create a new invalidation. Add “/*” to the object path and create invalidation.
Now we test our Cloudfront and it works!